Learn to Read API Documentation (by Building an Imgur Album-Specific Uploader)
Let’s write a small application to upload an image to an Imgur album using the API. Here’s how we’ll do it (and, more importantly, how I figured out what to do):
Note: This is a long post that shows you how to use documentation to find what’s important and apply it while building your application. In the process, we will build a small app that uploads a photo to an album using the Imgur API. If you’re only interested in the code, skip down to the embedded demo which includes the final code for the app.
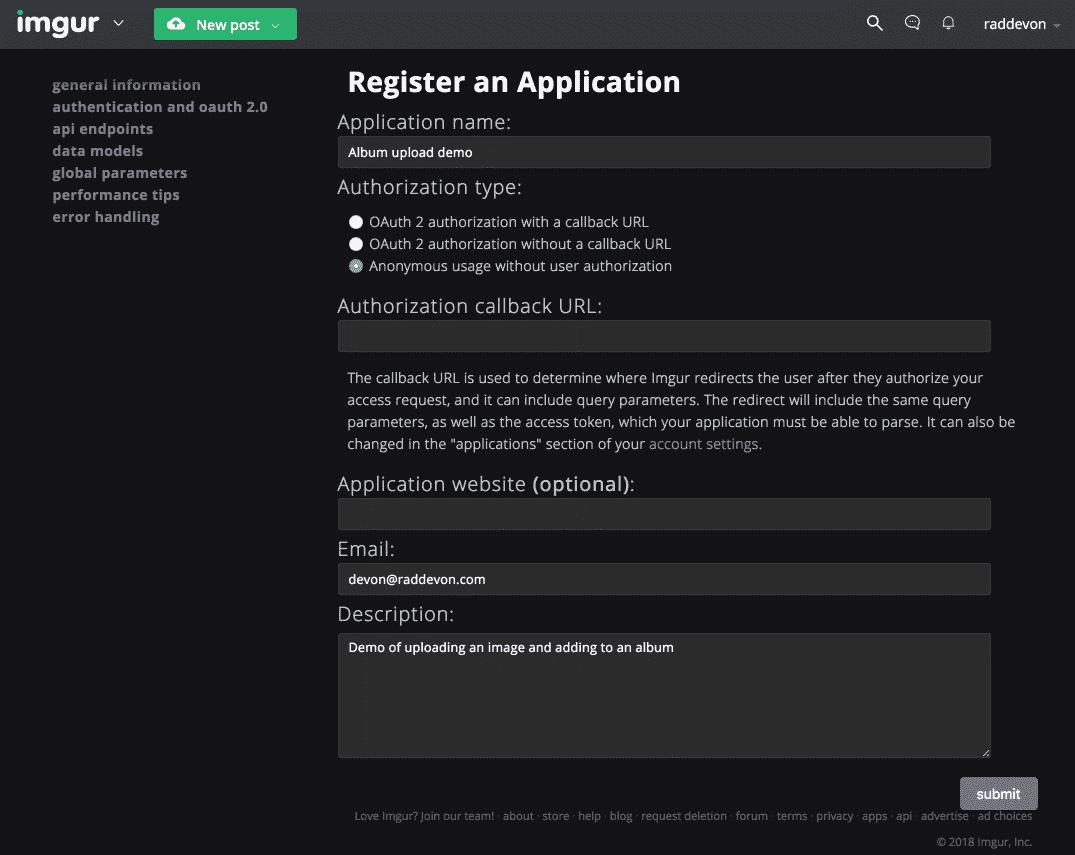
Register the App
I start at the Imgur API documentation. The “Intro” section tells me I need to register an application before I can make API calls.
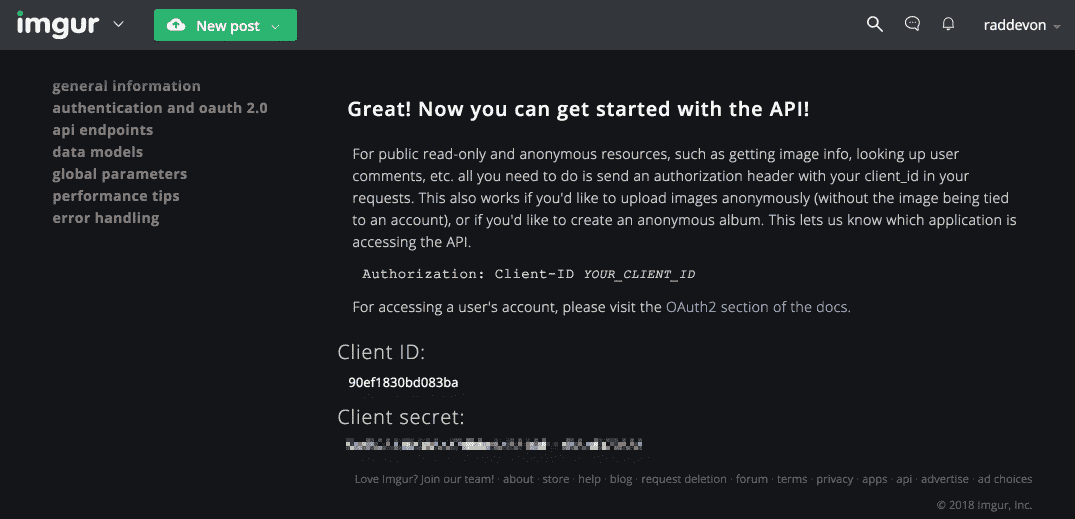
I do that and get a client ID and secret for my application.
Authentication
I read a little further into the authentication section and find I can authenticate my calls in one of two ways: via OAuth or via the client ID I obtained earlier. The OAuth authentication is used “for accessing a user’s account,” so I don’t think I need that. If I were building a full-fledged Imgur client, I would use OAuth, but, since I just want to upload to an anonymous album, I can use the client ID instead. The docs tell me I can do this by adding this authentication header to my HTTP request to the API:
Authorization: Client-ID <YOUR_CLIENT_ID>
Finding the Right Endpoint
Now, I know how I’ll send an authenticated request. I just need to know which endpoint to send it to. Since I want to upload to an album, the “Album” endpoints seem like a good place to start looking. I find one called “Add Images to an Album (Un-Authed).” Sounds right. Here’s the description:
Takes parameter, deletehashes[], as an array of deletehashes to add to the album. Alternatively, the deletehashes parameter can take a comma delimted string of deletehashes.
That description leads me to believe this is not the right endpoint for what I want to do. Delete hashes are a unique identifier Imgur uses for some of its resources. Knowing that and reading this description, I understand this endpoint is intended to take a delete hash for an existing image which will then be added to the album.
I want to upload an image and add it to the album. This might actually require two calls: one for the upload and another to add to the album. Let’s keep looking for the right endpoint. I’ll try to find one that lets me upload an image.
After expanding “Image,” I find “Image Upload.” This is definitely the right one for uploading. I see I have to submit the image parameter. The endpoint also accepts some optional parameters:
albumtypenametitledescription
Knowing the endpoint accepts an album parameter makes my life a lot easier. Rather than first uploading the image with one request and then adding it to an album with a separate request, I can do both with a request to the image upload endpoint.
The album parameter description reads like this:
The id of the album you want to add the image to. For anonymous albums, album should be the deletehash that is returned at creation.
I added the emphasis there because this is important to us. We want to upload the image to an anonymous album. Albums can be identified by either an ID or a delete hash. Since we want to upload to an anonymous album, we’ll need to identify it in the image upload parameters using the delete hash.
The Imgur API documentation has a sample request alongside each endpoint. By looking at the sample request for the image upload endpoint, I can see the request is sent with a content-type of multipart/form-data. I also take note of the endpoint (https://api.imgur.com/3/image) and the request method (POST). I’ll need to know all of this when I’m making the upload request later.
Creating an Album
Before I can do any of that, though, I need an album I can upload to. Since I already have API access, I’ll use the API to create one. I’m only going to do this once, so it doesn’t need to be part of the app. I’ll use a common unix tool curl (available from the Mac terminal emulator and in most Linux distros) to create the album. Here’s the command I’ll use:
curl --request POST \
  --url https://api.imgur.com/3/album \
  --header 'Authorization: Client-ID 90ef1830bd083ba' \
  --header 'Content-Type: multipart/form-data' \
  --form 'title=Album upload demo' \
  --form 'description=Demo of album uploading via API'
This command sends a POST request to the album endpoint to create a new album. The request has an Authorization header with my app’s client ID and a header defining the Content-Type as multipart/form-data. Then, in the form data, it sends a title and a description for the new album.
The command will then print the response from the API. Here’s the response from creating the album:
{"data":{"id":"bKbM4","deletehash":"EVGILvAjGfArJFI"},"success":true,"status":200}
The API responds with the new album’s ID, delete hash, and some properties indicating our request was successful. We’ll need this delete hash for our image upload requests to add the new images to the album.
Creating the Image Upload Form
Now, I’m ready to build my application. I’ll start with a basic HTML form that will allow users to select a file.
<form>
  <input type="file" required>
  <button type="submit">Submit</button>
</form>
Processing the Form
Time to start thinking in Javascript. I’m going to need to work with a couple of my DOM elements. I’ll need to put an event listener on my form so I know when the user submits it, and I need to be able to get the file the user selected in the file input. I’ll first select the form, and I’ll drill down from it into the file input element later when I need it.
const form = document.querySelector('form');
Responding to the Submit Event
I’ll listen for the form to be submitted.
form.addEventListener('submit', (event) => {
  // Logic will go here
});
I could have listened for a click on the submit button instead, but I like this method of listening to the form for a submit better. It also catches a press of the enter key in one of the fields.
Grabbing the File
Once the form is submitted, I need to grab the file and fire off a request to the API. I know Javascript has a file API, but I’m not sure how to use it. I search for it on MDN. I need to see an example of how to use it, so I click through to their article with examples. This example shows what I need to do:
var selectedFile = document.getElementById('input').files[0];
Here’s the first part of my submit event handler that grabs the user-selected file:
const fileInput = event.target.querySelector('input');
const imageFile = fileInput.files[0];
Building the Form Data
I know I need a FormData object since that’s the content type the API expects. From the MDN page on FormData, I find their article on how to use the objects. I decide to create the object from scratch rather than initializing it from my form. I’m going to need to add a parameter for the album anyway, so I may as well create it manually.
const formData = new FormData();
formData.append('image', imageFile);
formData.append('album', 'EVGILvAjGfArJFI');
This uses the imageFile I grabbed previously from the form and adds both that and the album’s delete hash (Remember, we have to use a delete hash since this is an anonymous album.) to the FormData object.
Sending the Request
I’m now ready to build my request and send it off to the Imgur API. In the past, I would have reached for jQuery or used XMLHTTPRequest to send the request, but I know Javascript now has a more modern Fetch API that uses promises. (Promises are a really cool way to write asynchronous code that makes it much more readable than callbacks.) I’ll use it instead. Here’s my request:
fetch('https://api.imgur.com/3/image', {
  method: 'POST',
  headers: new Headers({
    Authorization: 'Client-ID 90ef1830bd083ba',
  }),
  body: formData,
})
  .then((response) => {
    if (response.ok) {
      alert('Image uploaded to album');
    }
  })
  .catch((error) => {
    console.error(JSON.stringify(error));
    alert('Upload failed: ' + error);
  });
The first argument to fetch is the endpoint. The second is an options object in which I set the HTTP method to POST, add my authorization header with my app’s client ID, and specify the data for the body of the request (in this case, the formData object I built earlier). I chain off that with a then method which specifies which function should run on a success. I chain off that with a catch method that specifies what to run on a failed request. This is Javascript Promises at work.
Fixing the Problems
That’s almost everything. I test the app… and it doesn’t work. I keep getting my failure alert whenever I try to upload an image. I pull up Chrome DevTools to get some more insight into what’s happening. (If you’re not using Chrome DevTools, you should give it a try. CodeSchool has a great free course to get you up to speed on how to use it.)
Oddly, the error doesn’t get logged to the console as I’d expect. I switch to the network tab to see what happens with the request, and I find it’s being canceled. I actually spent several days puzzling over what the problem was and ended up posting on StackOverflow (a great resource for getting help with development). I got an answer which eventually led me to the realization.
When an HTML form is submitted, by default, the browser sends a request to an endpoint with the form data. The endpoint is defined by the form’s action attribute and the request method is defined by the form’s method attribute. Those don’t really apply in our case since we will handle the form in Javascript. As a result, I haven’t defined them on the form (which technically makes the code invalid since the action attribute is required). The browser will use the default method of GET and will submit the form data to the current URL since we haven’t set the action attribute.
This triggers the current page to be reloaded interrupting our fetch request triggered via Javascript. That’s why the request was canceled: it was interrupted by a new request for the current URL. It was difficult to see what was happening because the page was simply being reloaded, and, since I wrote the application in CodePen, the network history wasn’t being refreshed since the rest of the site wasn’t being reloaded — only my application.
Fortunately, Javascript has a simple way to deal with this. If you’ll remember, way back when we wrote the submit event handler, we named an event parameter to the event handler function. When the event triggers, the event object is passed to the event handler function. Each Javascript event objects has a preventDefault method which does exactly what we want here: it suppresses the default browser event handler which would normally be triggered by the event. I added this code to the top of the event handler:
event.preventDefault();
and just like that, the browser stops interrupting my fetch request and lets me handle the form submission as I please.
Demo
That’s it! Our simple app that uploads images to an imgur album is up and working. Here’s a CodePen you can try:
Once you’ve uploaded something, check out your image in the album at the Imgur album page.

